Project JPacman #5: Graphics and Controls
After JPacman had given the first signs of life using Cocos2d-x, it was time to make it finally playable again. What was missing for this? Two things: to see the graphics on screen and to use the keyboard to control menus and main character.
Graphics on Screen
In order to display the graphics on the screen and keep the logic that I had already implemented in the original version of JPacman, I had to first check how it did it work and which were the contents of the image files that the project already contained.
I discovered that JPacman loaded only one large image per scene. At the top of each image there was the background of the scene at full screen size, which meant a resolution of 640 by 480 pixels. There were four different scenes in the game and so there were four image files: intro, main menu, best scores screen and the game scene.
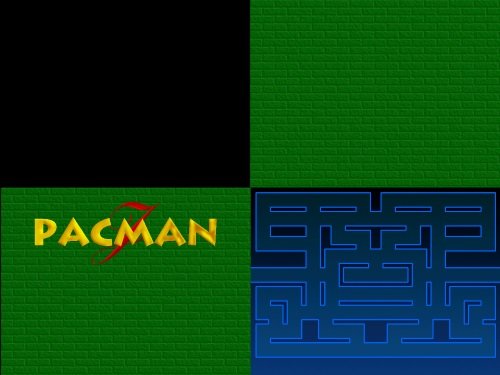
Each of the four files had repeated in the bottom a series of images with all the drawings of the animations of the game characters and dynamic objects. It surprised me that almost twenty years ago I actually used what is known in the industry as a textures atlas, because it is one of the most efficient ways to handle image files in a videogame of this type.
I had to convert image files to PNG, because the original version of JPacman used image files in BMP format, and Cocos2d-x does not support that format. Also, I separated the texture atlas sectipn from the backgrounds in the image files because I thought it would be better for managing the loading and unloading of the images.
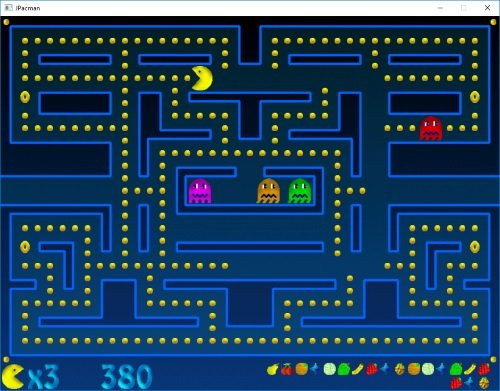
Already focused on the code, making the graphics work was not difficult at all. I had to work on the the Gfx.cpp file, especially on the DrawSprite function to be able to register in the Cocos2d-x scene system the images that needed to be displayed. I also had to be careful with coordinate systems because I discovered, the hard way, that the Y coordinate was inverted between Direct X and Cocos2d-x.
Finally, I fixed an awful bug I had in the code regarding the GFXFile variable, with which I was doing what is known as a “memory corruption”. That surely explains unexpected crashes that I experienced in the original version and that I never understood why they happened. For more details, you can see the code in Bitbucket and the change I made.
Controls and Keyboards
The next step was to be able to control the menus and the character with the keyboard. Inspecting the code, I discovered that I had also programmed (or copied from somewhere) the functionality to be able to use gamepads with the game, but apparently it was incomplete. Challenge for a later stage, I told myself.
For the keyboard to work, I first had to modify several files because the constants I used to identify the keys conflicted with Cocos2d-x constants. To all the constants of the game I had to add the JPACMAN_ prefix, and that fixed the issue.
Then I added the code to register a Cocos2d-x event listener and added the handling of the OnKeyPressed and OnKeyReleased events, which was a lot easier than I expected.
JPacman was playable again!
Juan Pablo makes videogames since he was 8 and he is a father since 2004. Today, he has three children and he has worked in more than 20 videogames. He got interested on how paternity and the videogame industry are related and he decided to write about it, founding "Papa Game Dev".

Leave a Comment
Your email address will not be published. Required fields are marked *